Do you want to add a custom tag to WordPress posts? Want to eliminate the need for a scriptlet tag? Simply, use custom tags to eliminate all scriptlet tags that are considered an inconvenient approach in JSP.
Custom Tag is defined with a number of attributes to allow additional information in the tag to perform associated operations.
There are numerous ways to add a custom tag to WordPress posts. But in this article, we will get familiar with the most straightforward manner of using a WordPress plugin.
We suggest you use Gutena Recent Post Custom Tag WordPress Plugin.
Later in this article, we will definitely learn a step-by-step guide to adding a custom tag to WordPress Posts. But before that let’s get familiar with the plugin that will perform this task.

Gutena Recent Post Custom Tag is a plugin that enables you to add a custom tag to your recent posts. Not only that you can add a custom tag on must-read, featured posts, hot, top new popular, and much more.
Using its features you can attract visitors to your recent posts in the best way possible. This plugin is new and ensures updates on a timely basis to meet the users’ requirements.
It has the option to translate your “Gutena Recent Post Custom Tag” into your own language. The active and professional support team will help you out as and when you need them!
Best Features of Gutena Recent Post Custom Tag WordPress Plugin
Let’s get familiar with some of the features that make this plugin a suitable option to add a custom tag to posts!
- Boost UX: This plugin has been built considering the user’s side equally. This way, your visitors and customers will be engaged and the bounce rate will minimize. Finally, your website will rank at the top of different search engines.
- Amazing Professional Support Team: One of the best parts about using the Gutena Recent Post Custom Tag plugin is its professional support team. They will help you 24/7.
- Incredible Customization Options: This plugin has plenty of customization options. You can make changes and edit them as per your needs.
- Responsive: Its responsive nature will make your website look perfect across devices of all sizes.
- Speed Optimized: Gutena Recent Post Custom Tag is speed optimized which will lead your website to appear in seconds on the customers’, users and visitors’ side.
Add a Custom Tag to WordPress Posts
Setting up a whole website might be difficult if you’re a WordPress Beginner!
Don’t worry, as InstaWP might be the right solution for you. It is an invaluable tool that will help you build as many testing websites as you want.
This tool is a perfectly suitable choice for all designers, developers, agencies, beginners, enterprises, and much more.
Step 1: Install and Activate the Plugin
First of all, you need to Install and Activate the Gutena Recent Post Custom Tag plugin on your WordPress website.
Get this plugin for yourself on the WordPress Repository or simply download the plugin from the website’s Dashboard directly.
Go through the tutorial ‘How to Install New WordPress Plugin’, if you don’t know how to install and activate your plugin.
Once the installation is completed, make sure to Activate the plugin.
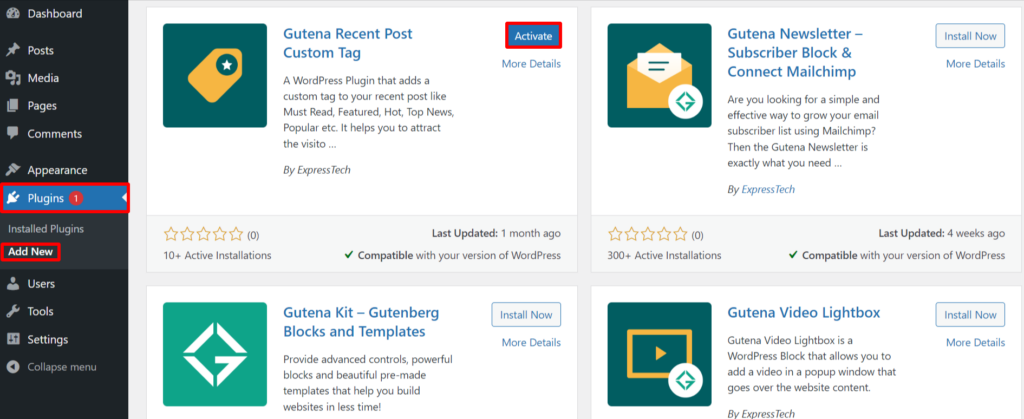
This is the end of our first step to getting the plugin installed and activated!
Step 2: Create or Edit a New Post
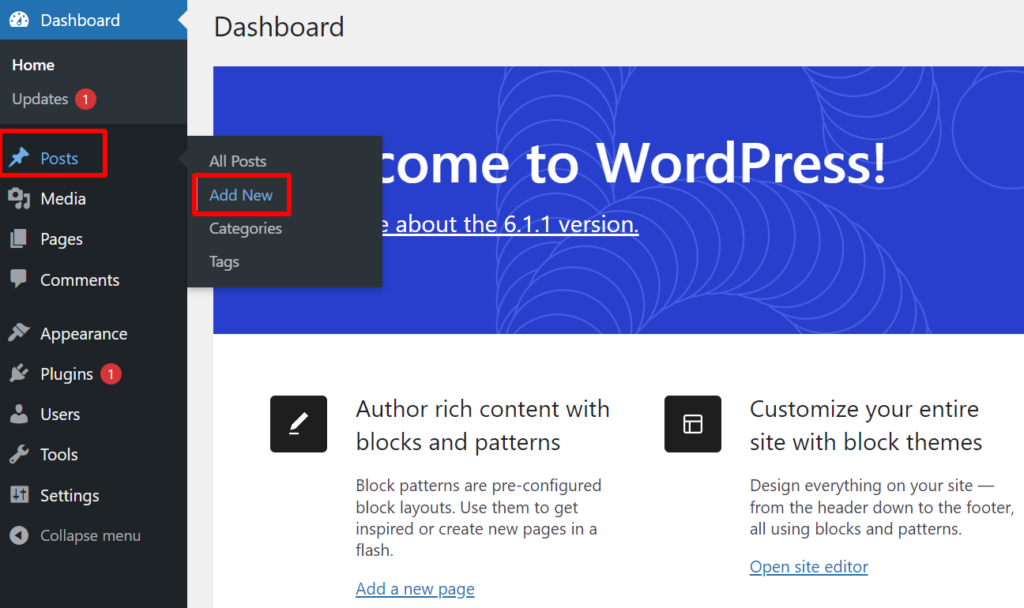
Make sure to follow the instructions to add a new post:
- Go to Posts>>Add New option at the left sidebar.
Step 3: Add Tag on Latest Post
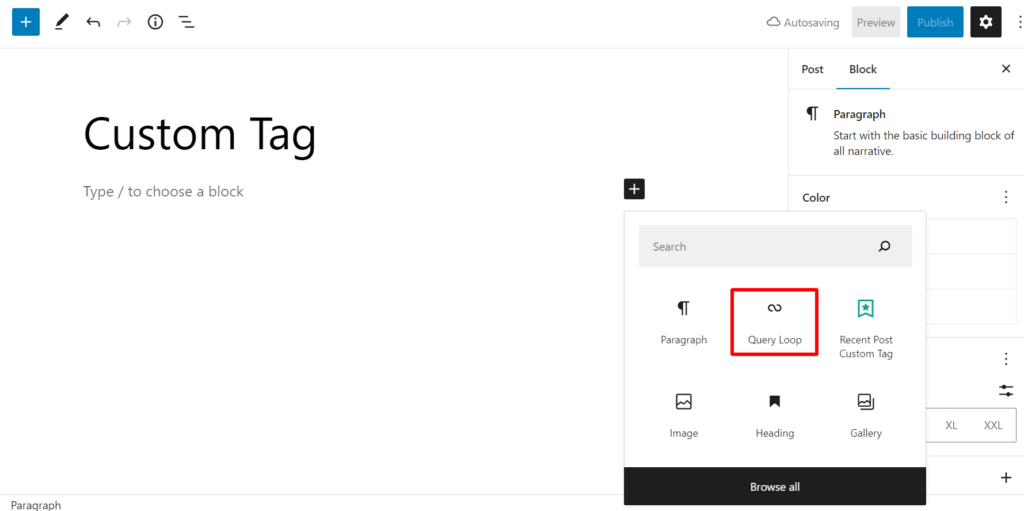
- Click on the ‘+‘ icon.
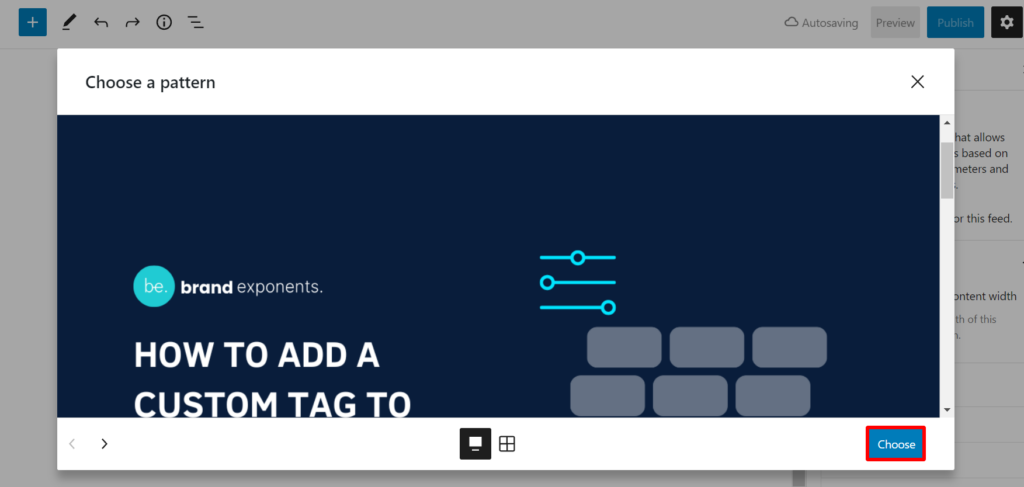
- Then search and select the Query Loop option.
- Then click on the Choose button.
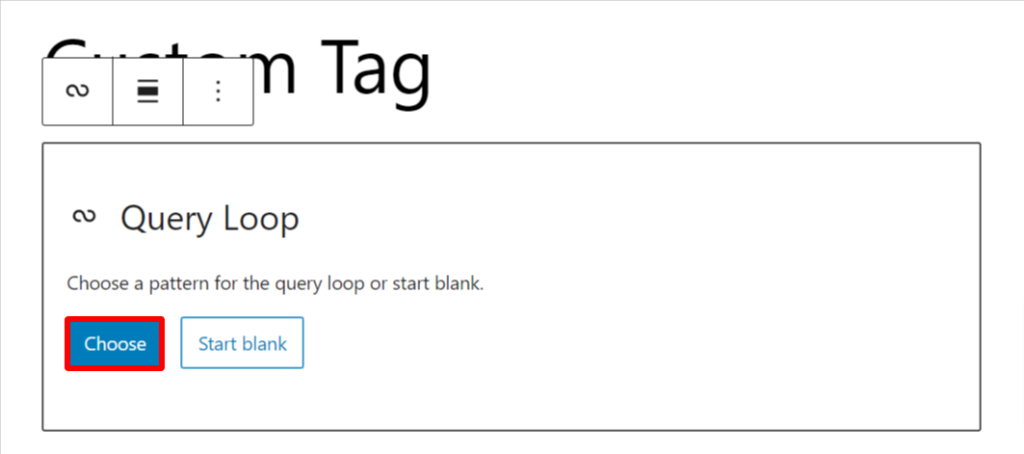
- Once again, click on the choose option.
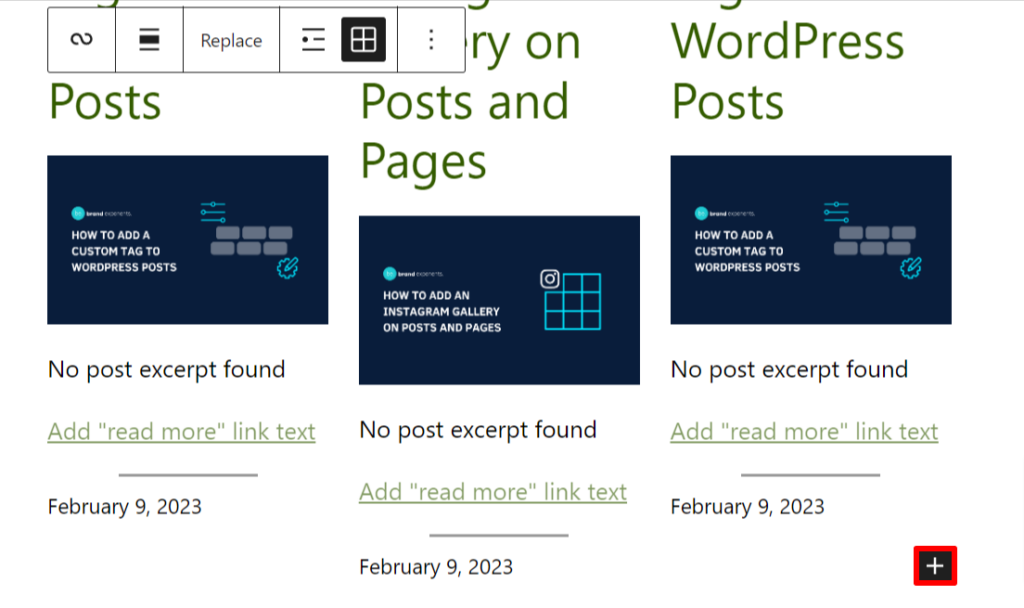
- Now, click on the ‘+‘ icon again.
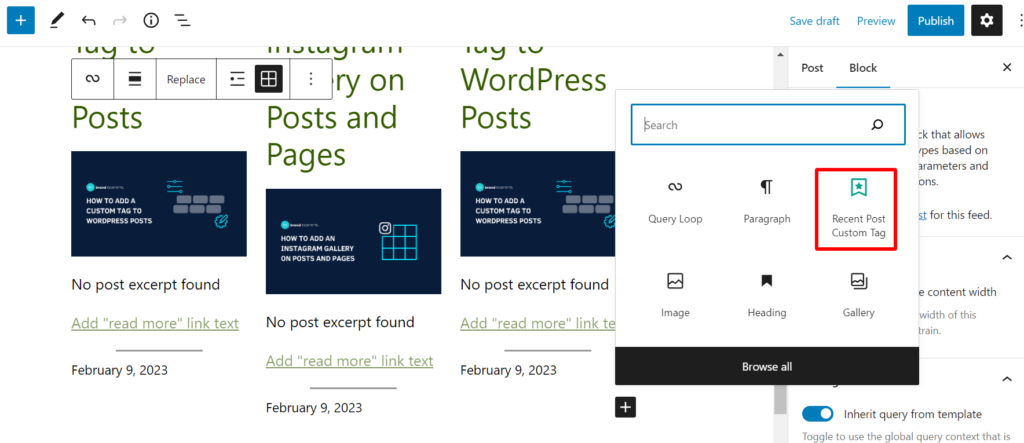
- Select the Recent Post Custom Tag Option.
- You can simply add the button by dragging and dropping it wherever you want.
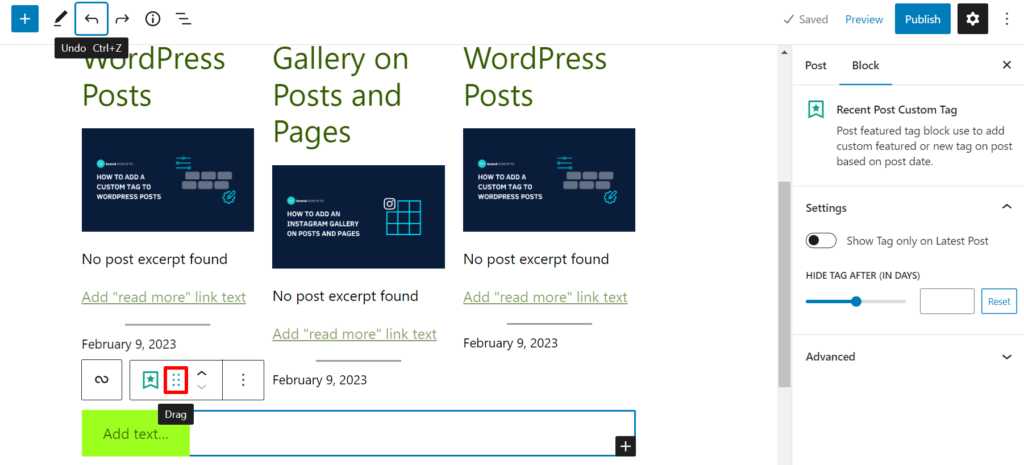
- You can simply change the Text of the button.
- As it is in a loop when you change the text of a button, all button’s text will be changed.
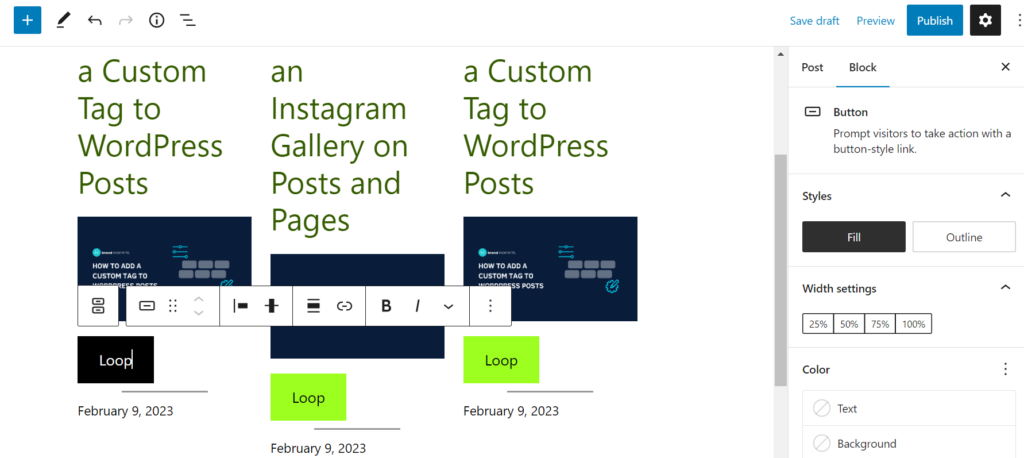
- Select one of the tags.
- Open the list view.
- Then click on the Recent Post Custom Tag option.
- On the right side you can see Show Tag only on the Latest Post.
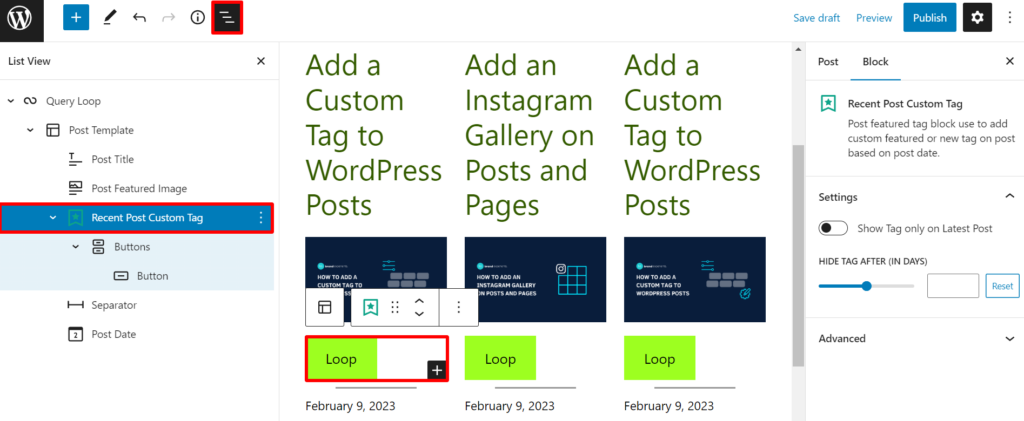
Step 4: Customize Settings to Add a Custom Tag to WordPress Post
- Select the Block option.
- In the Styles, select the suitable option from Fill and Outline.
- Select your width size in Width Settings.
- Choose your Text and Background color.
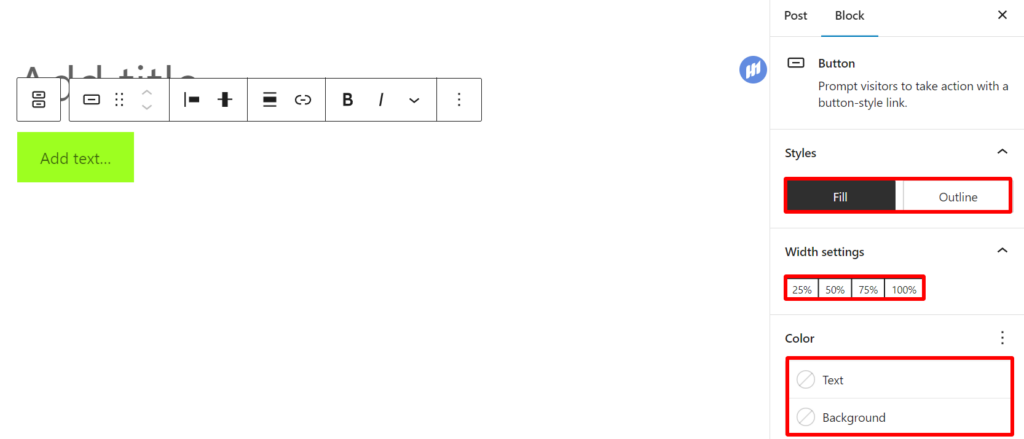
- In the Typography option, select your Size Default.
- Then select the padding of your button.
- Choose the Radius of your button’s Border.
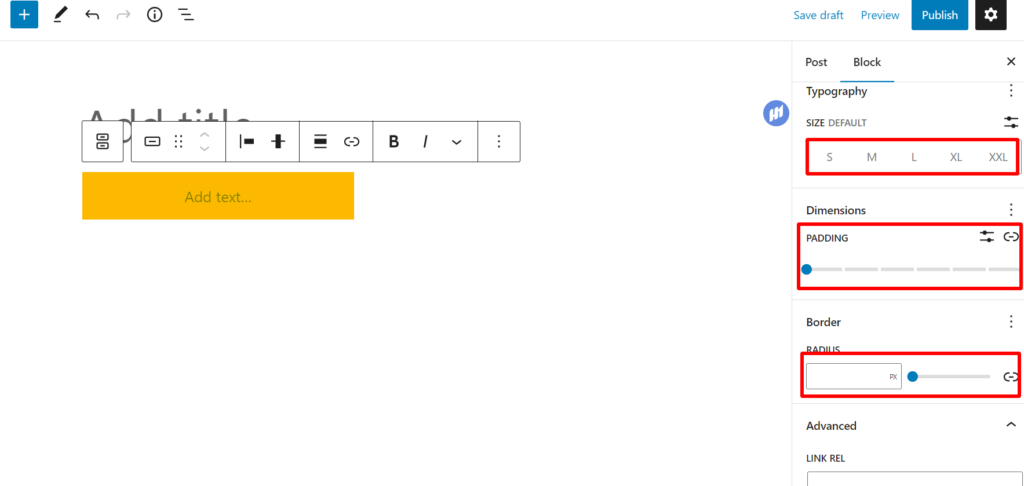
- Add Link REL and HTML Anchor in the Advanced option.
- Add Additional CSS Class(es)
- Finally, click on the Publish button.
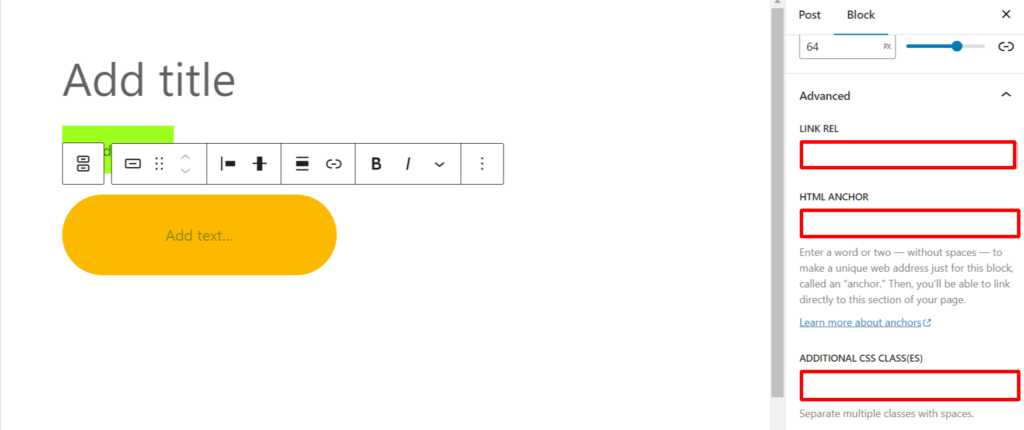
- When you Preview the post, you’ll see an output as shown in the screenshot below.

Step 5: Add Tag to Single Post
The Process to add a Custom Tag in a single post is similar.
- Add the Tag in the place you want by clicking on the ‘+‘ icon.
- Then select the Recent Post Custom Tag option.
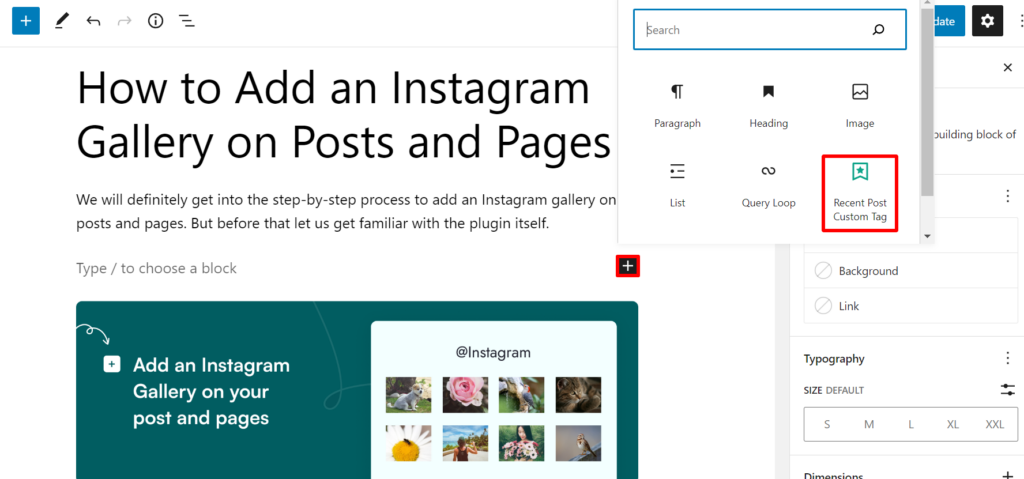
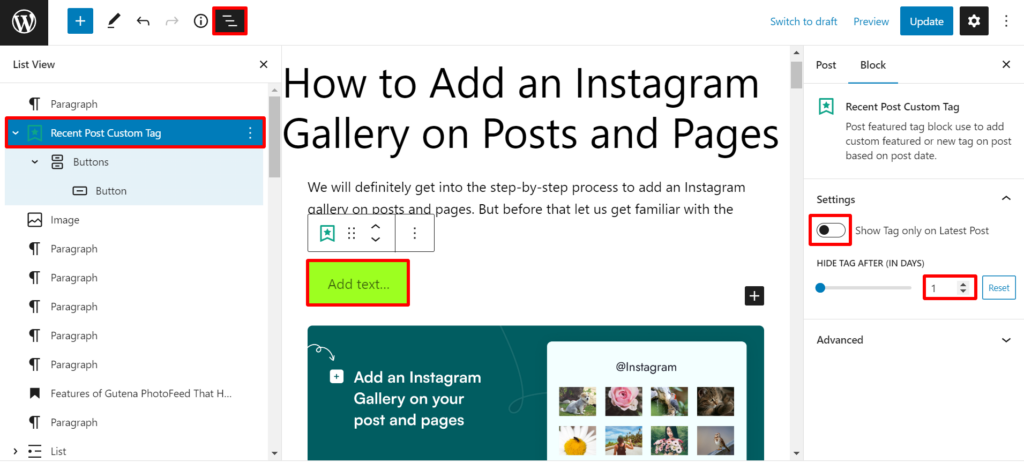
- Click on the tag and change the text as you want.
- Then click on the List View option.
- Select the Recent Post Custom Tag option.
- On the right side you can Show/Hide the Tag only on the Latest Post.
- Moreover, you can also select the number from Hide Tag After option.
This is it, this way you can add a Custom Tag in a number of posts or an individual post.
You can also check out our YouTube Tutorial video.
Wrapping Up:
Adding a Custom Tag might be one of the right decisions that you’ll make for your website.
We hope this article guided you through to add custom tag to WordPress posts without any hassle.
If you have used InstaWP or Gutena Recent Post Custom Tag plugin before, feel free to share your review with us in the comments section below.
Also, Check Out :


