WordPress is known for its simplicity and ease of use. Tatsu Builder tries its best to ensure that you have access to everything possible without getting in your way. With the help of the Advanced Custom Fields (ACF) plugin, we can create custom fields that can be used on the front-end or back-end of a website.
With the release of Tatsu v3.4.0, and Tatsu Pro v1.0.3 we have added ACF integration. View the changelog here. With ACF, Tatsu Builder gives you unlimited possibilities for adding custom data to WordPress content. You can create any number of custom fields, assign them to content types, and modify their values — all from within the same place. And with Tatsu Builder, you can dynamically insert that data directly into your designs with all the styling options you’ve come to expect from Tatsu Builder.
Dynamic Fields are of great use and can help you reduce tiring tasks that require adding the same content every now and then. Following are the steps that can help you use ACF with the Tatsu Builder:
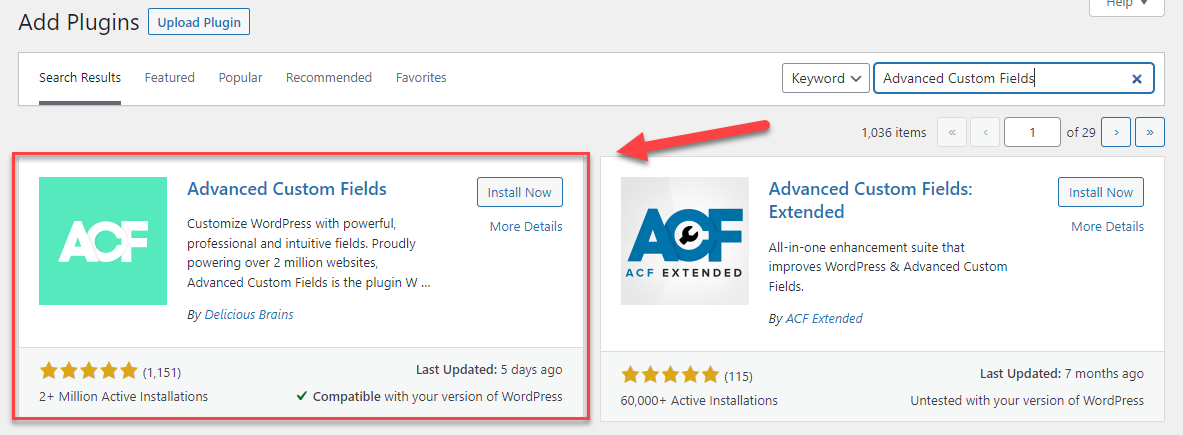
Step 1: Install and Activate the Advanced Custom Fields (ACF) plugin.
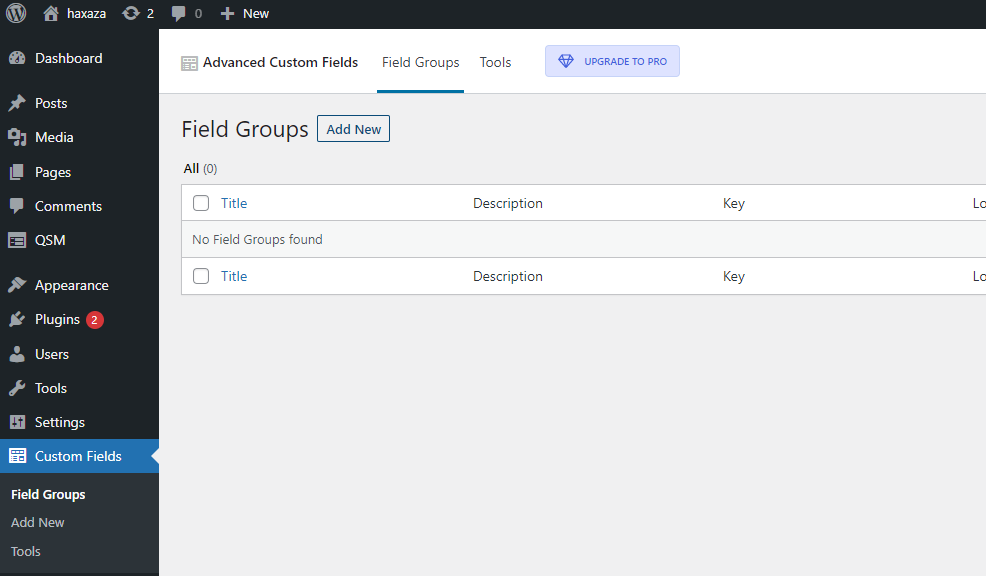
Step 2: Navigate to Custom Fields > Field Groups and add a New Field Group
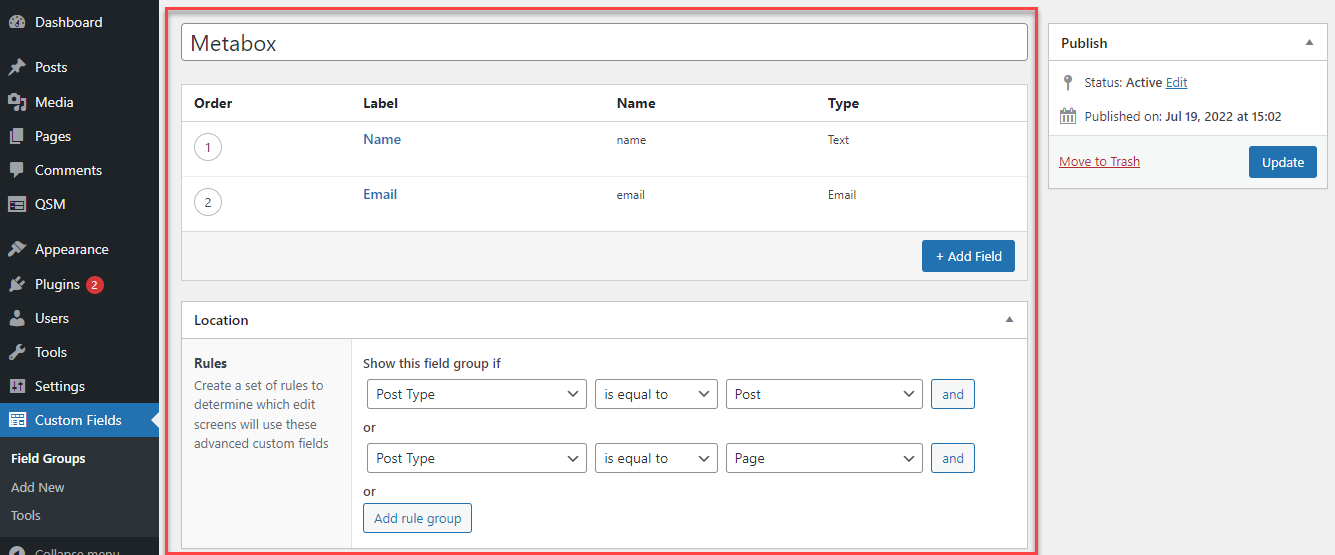
Step 3: Configure the New Field group as per your requirements. But make sure you enter the Field Labels and Select a Field Type.
Next, you need to add rules to determine which edit scenes will use the newly created Advanced Custom Fields from the Location Section.
As we’re gonna use Tatsu to Edit posts and pages on a website, we will create two rules for Post and Page edit screens.
Hit the Publish Button once done, this will publish your changes.
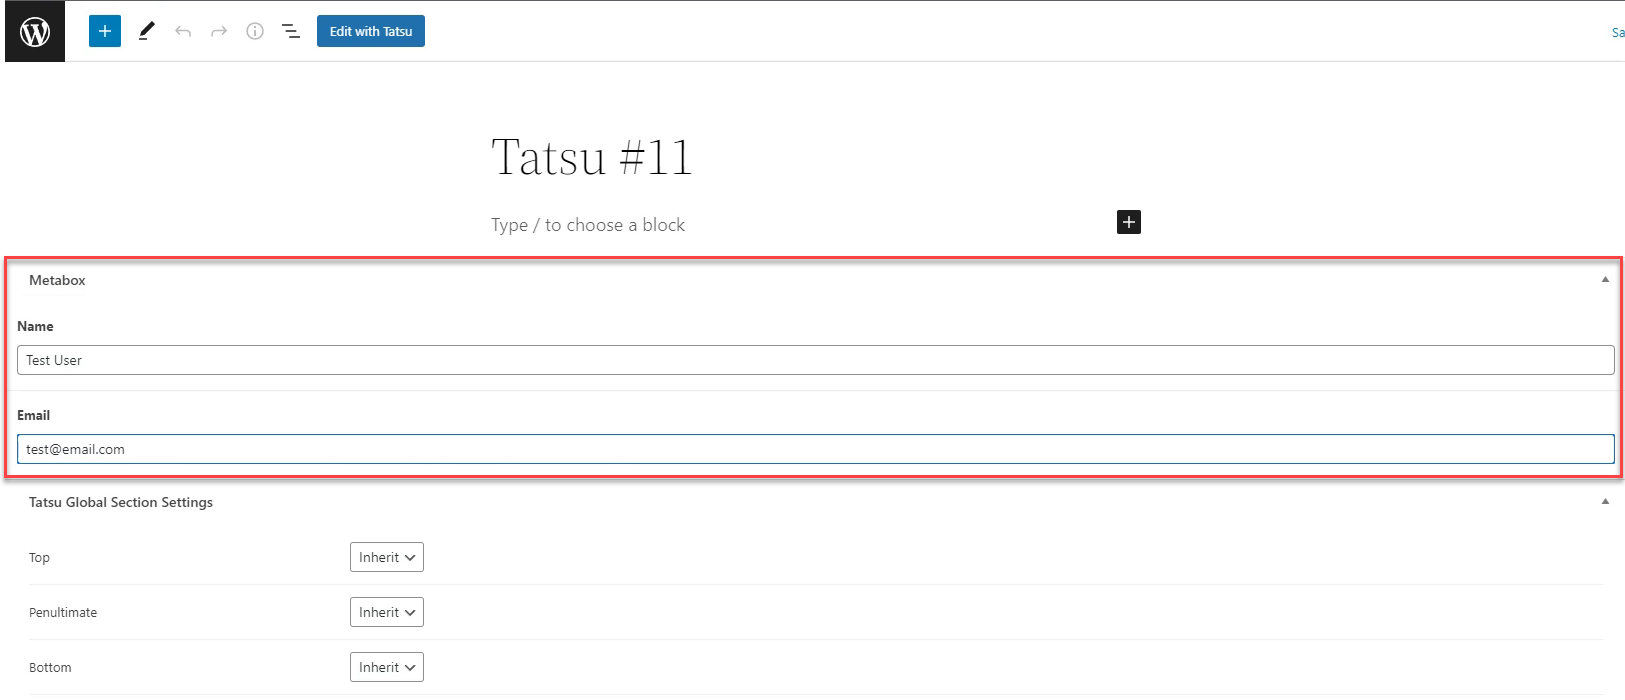
Step 4: Navigate to Posts and select a post to Edit. You will find two new Fields in the Metabox section (The label name). As seen in the image above, there are two meta boxes “Name” and “Email”.
Next, we will input the content in those meta boxes that we want to be picked up by the dynamic fields.
You can now, update/publish the page to apply the changes.
Step 5: Click on “Edit with Tatsu” on the opened page/post and add the Text Block Module of Tatsu. You will now notice a new tab beside the text editor. That’s the Dynamic Icon.
The new Tab, allows you to Insert the created Dynamic Field into your Tatsu Text Block.
Click on the select drop-down and select any of the new fields of the Advanced Custom Fields and click Insert.
This will add the field in your text block and automatically input the content that you updated inside those meta boxes in Step 4.
Similarly, you can add any of the Tatsu Modules in your post and insert the created “ACF Field Type” to it.
If you need any help implementing the Dynamic Fields with Tatsu drop us an email at support@brandexponents.com we’ll be happy to help you out.


